
Install Google Tag Manager in 5 Minutes: Quick Setup Guide

by
François Lecomte
Sep 14, 2024
Identify and convert your most valuable users
Sign Up
Google Tag Manager (GTM) is a powerful tool that allows you to manage various marketing and analytics tags on your website without having to modify the code. In this guide, we'll walk you through the process of installing and configuring Google Tag Manager, which typically takes less than 5 minutes.
Step 1: Create a Google Tag Manager Container
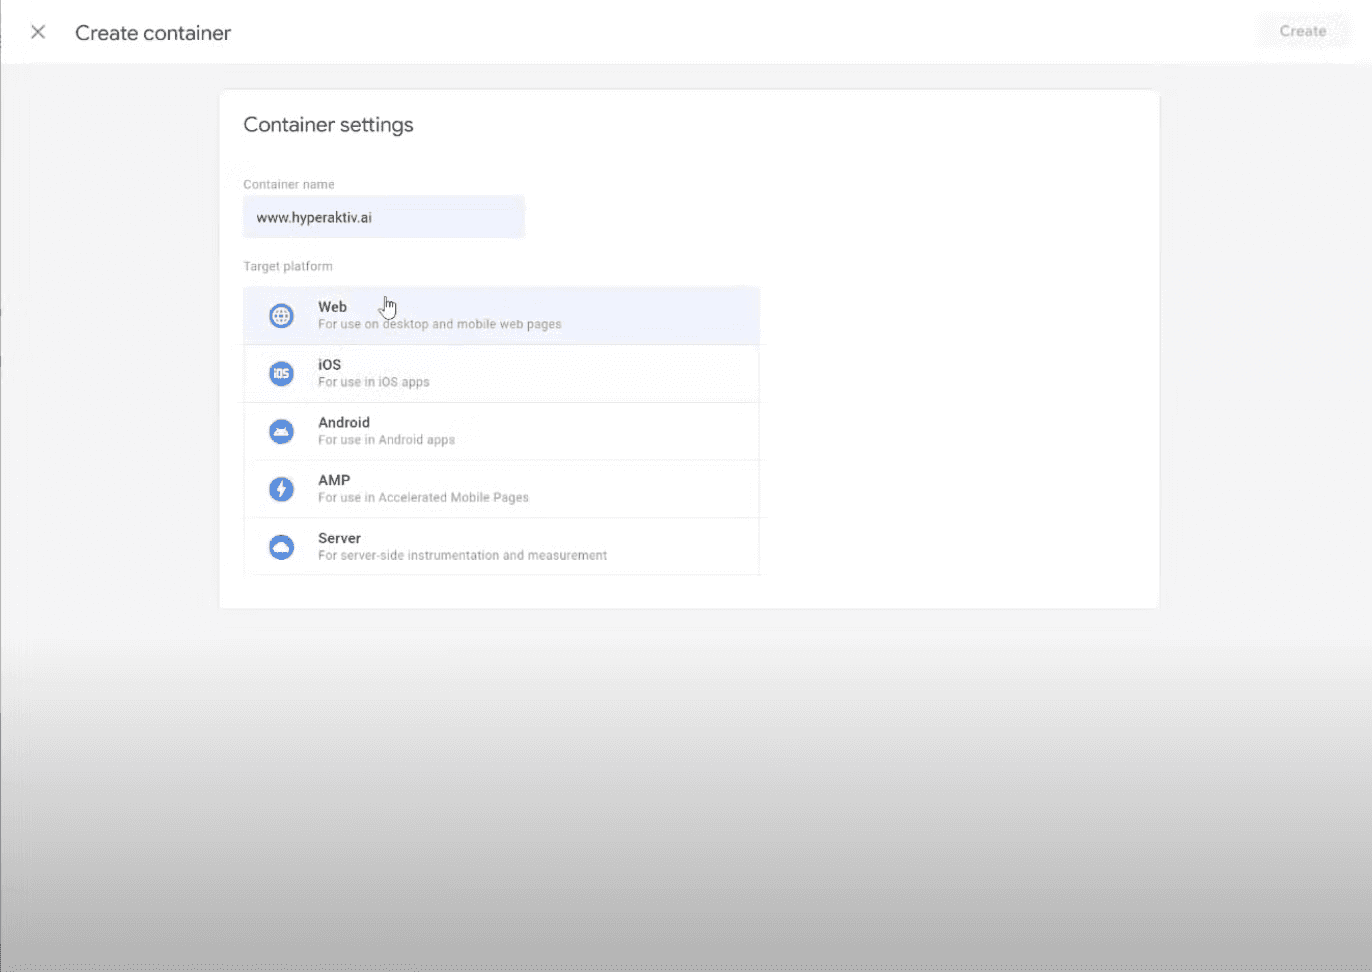
Go to tagmanager.google.com.
Create a new container with the type "Web"
Note that you only need to create one container for both your website and web app
Step 2: Install Google Tag Manager on Your Website
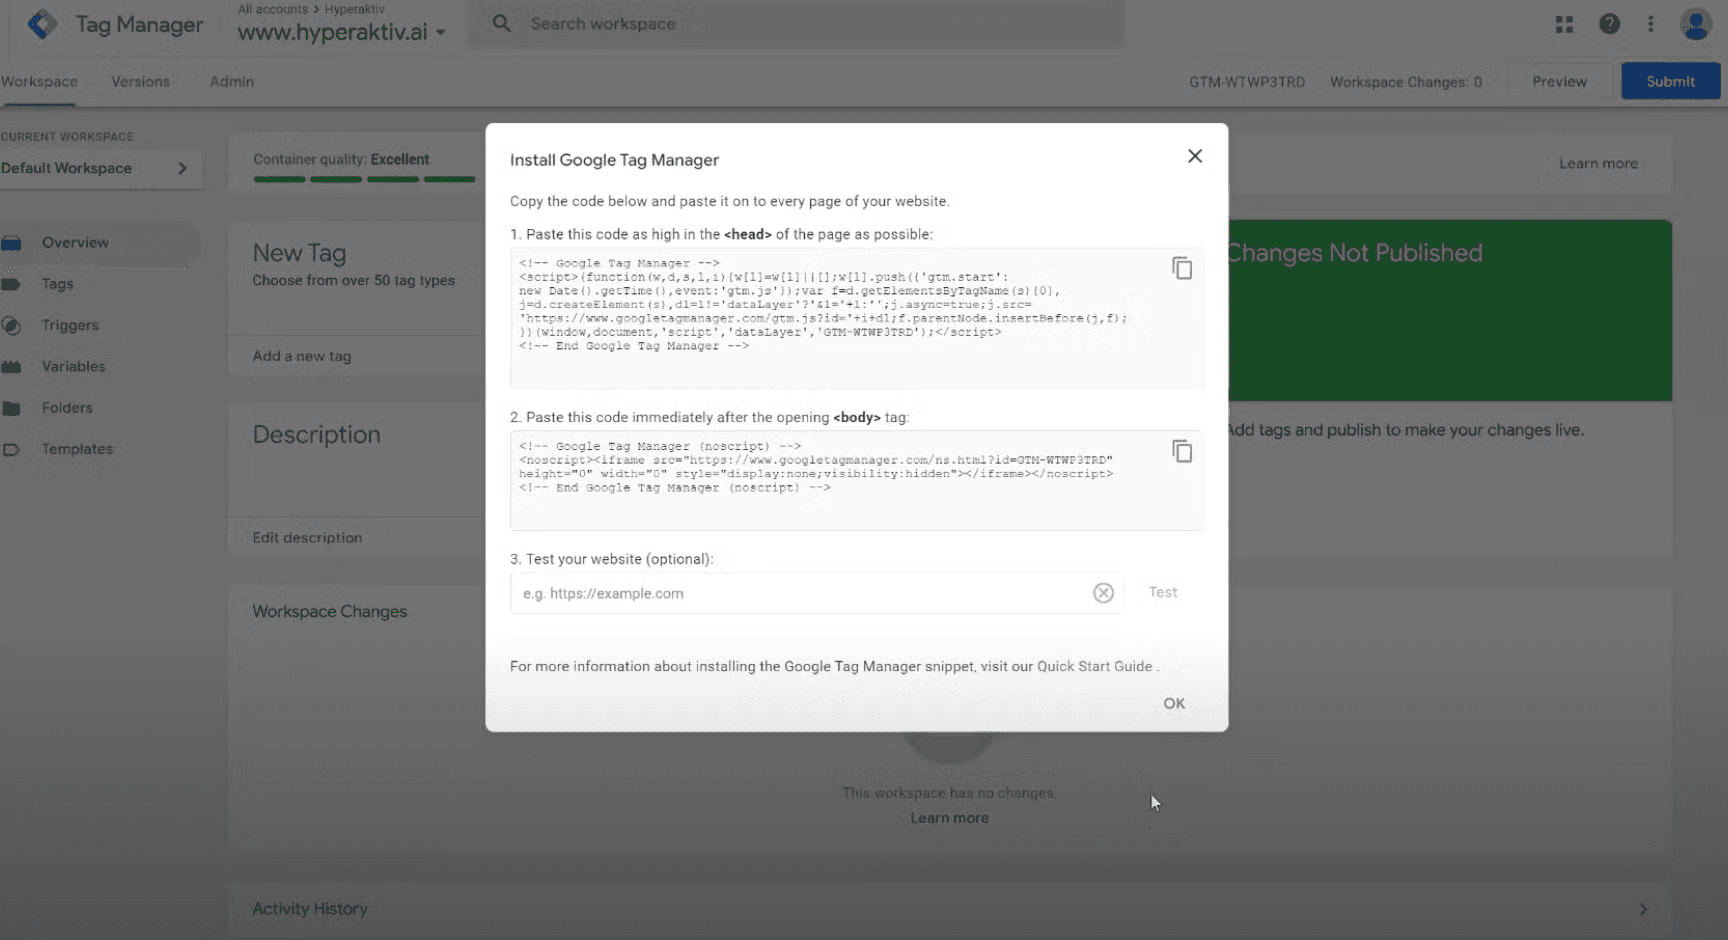
After creating your container, you'll see instructions for installing GTM on your site. You'll need to add two scripts to your website:
The first script goes in the <head> section of your HTML
The second script goes immediately after the opening <body> tag
Note for CMS Users: If you're using a Content Management System (CMS) like Bubble or Framer, the installation process might be different. Usually, you'll need to use a plugin in the CMS. Check your CMS documentation or our guide for specific instructions.
Example of how the code should look in your HTML:

Step 3: Verify the Installation
To ensure GTM is correctly installed:
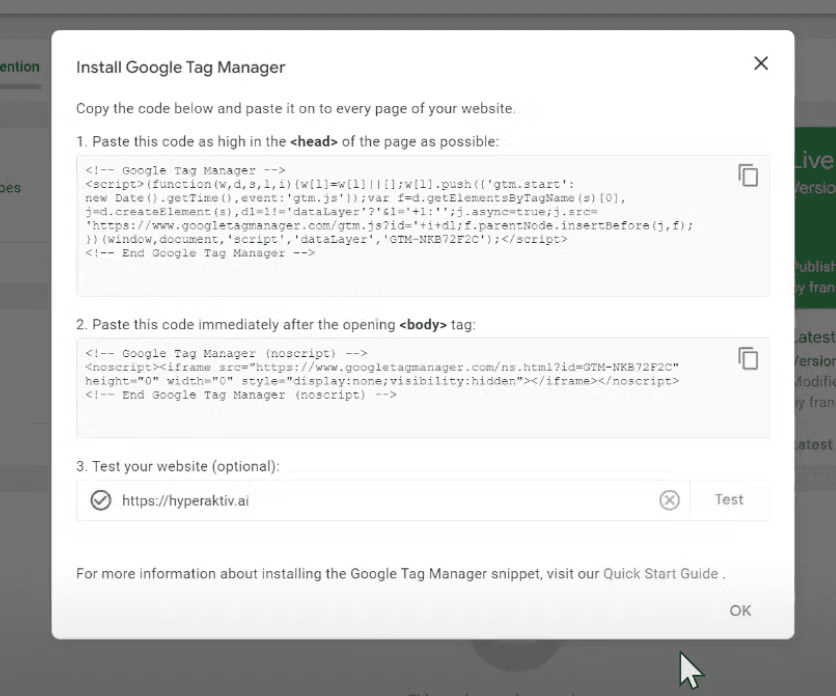
Use the GTM installation checker feature
Enter your website's URL and click "Test"
Wait for the checkmark to appear, confirming the successful installation
Step 4: Understanding Tags and Triggers
Now that GTM is installed, let's cover two crucial concepts:
Triggers: Events that occur on your website or web app (e.g., button clicks, page views)
Tags: Scripts that send information to tracking software when triggered
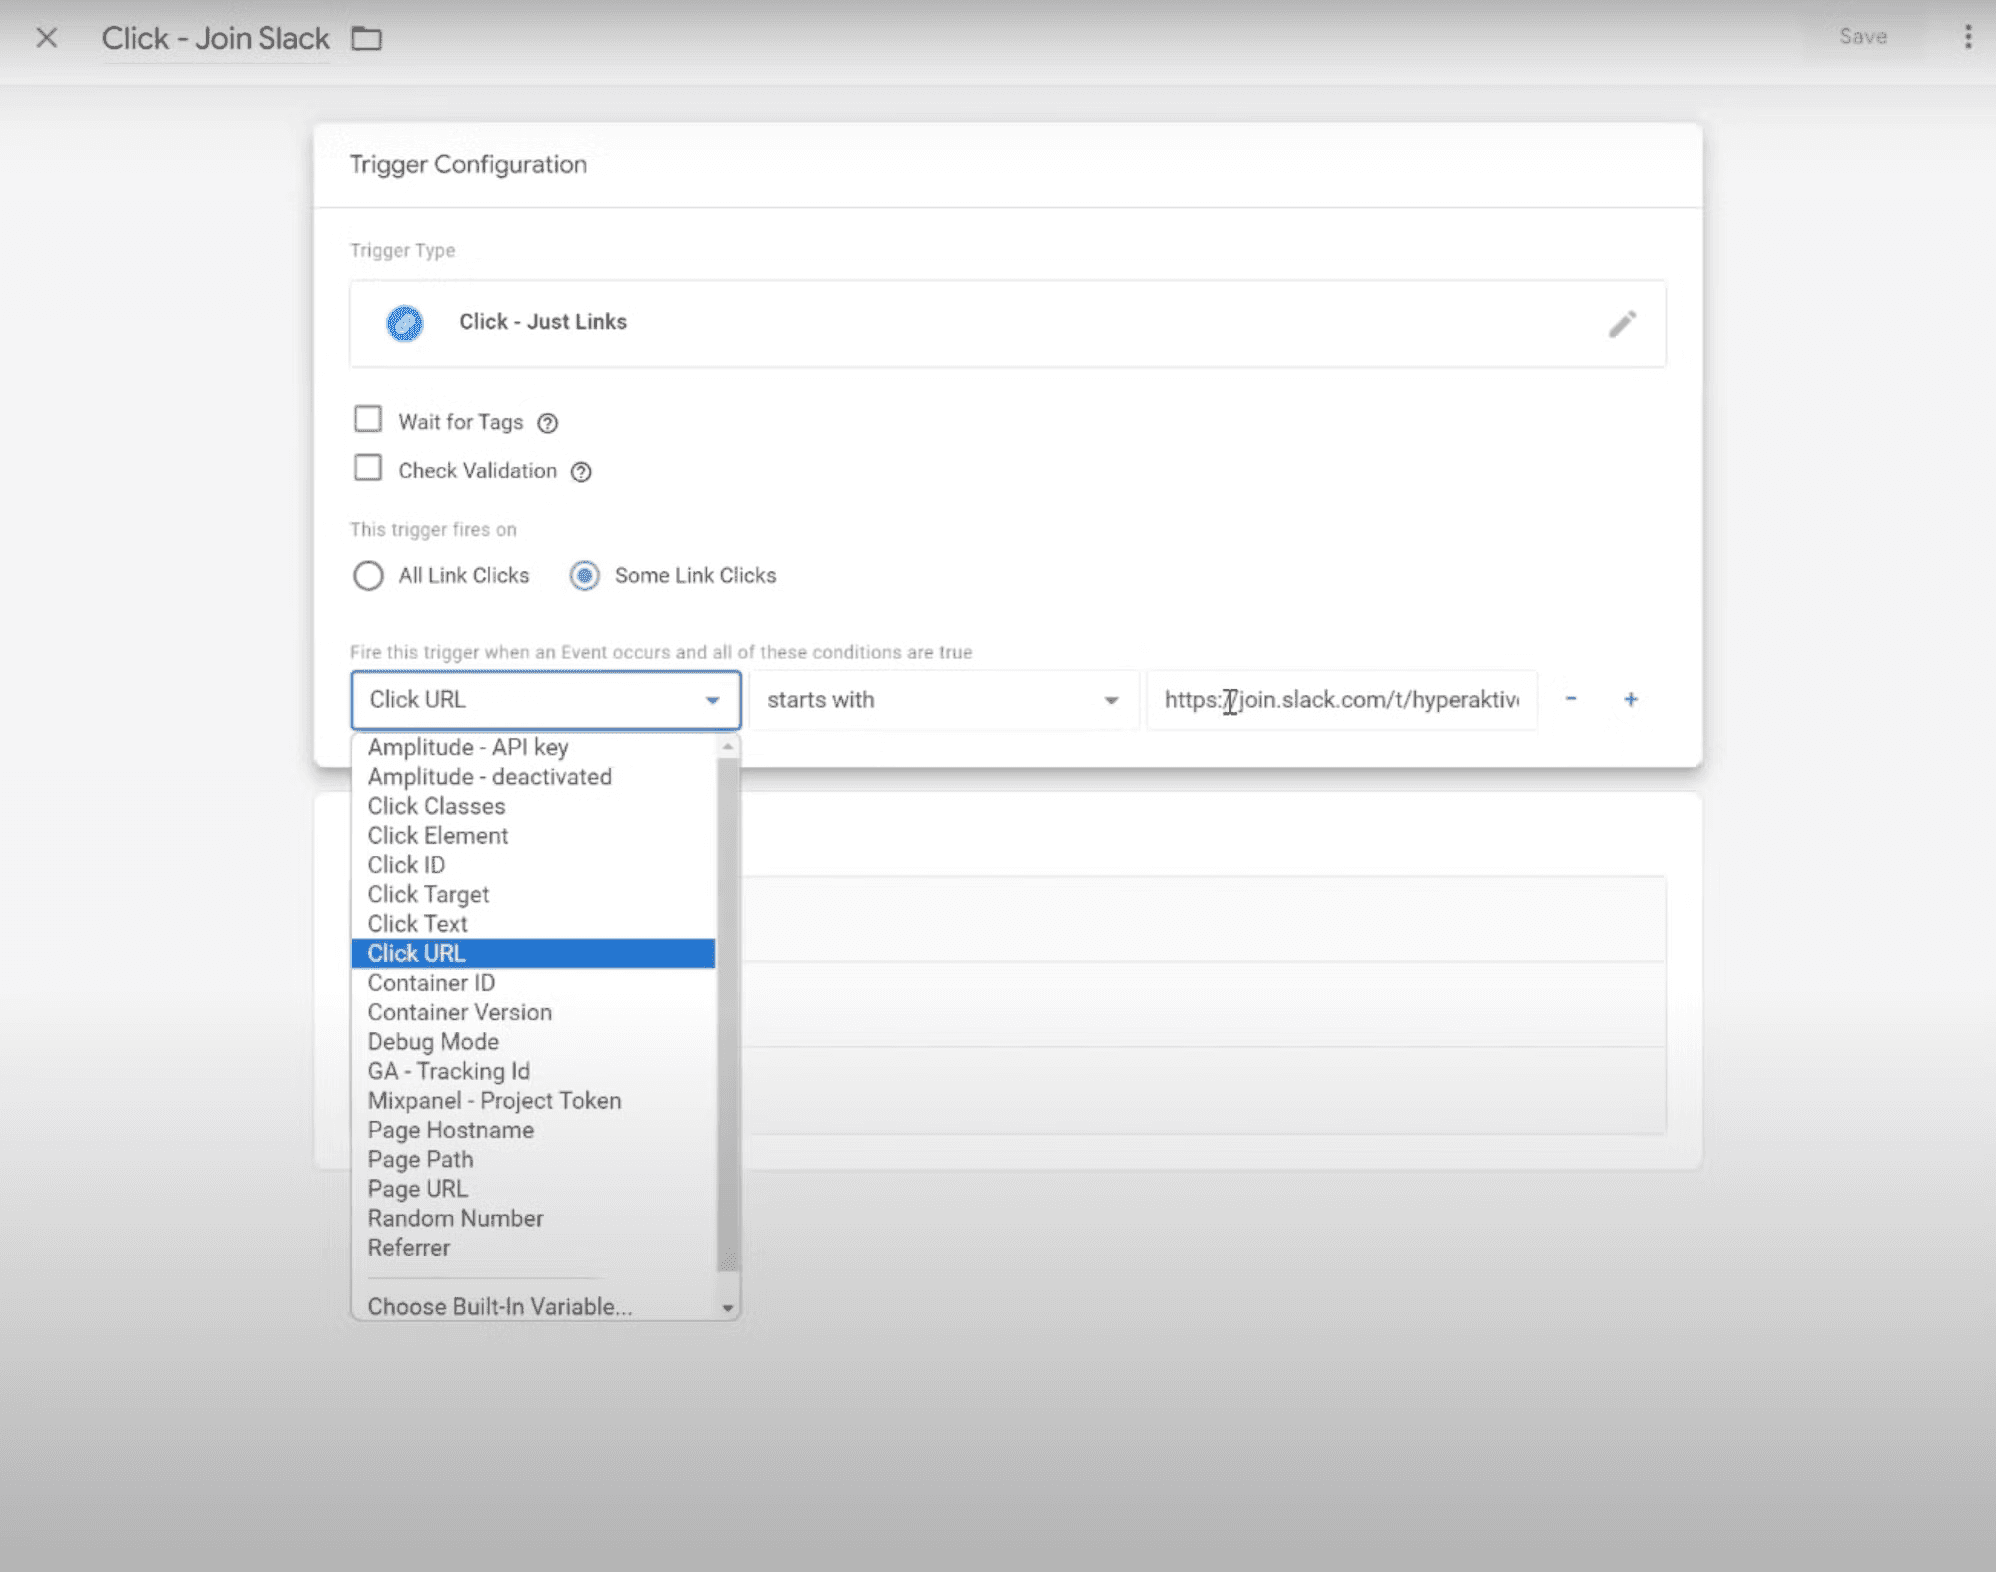
Step 5: Creating a Trigger
Let's create a trigger for tracking clicks on a specific link:
In GTM, create a new trigger
Choose the trigger type "Link Click"
Set a condition to capture only the desired link (e.g., URL starts with a specific text)
Step 6: Creating Tags
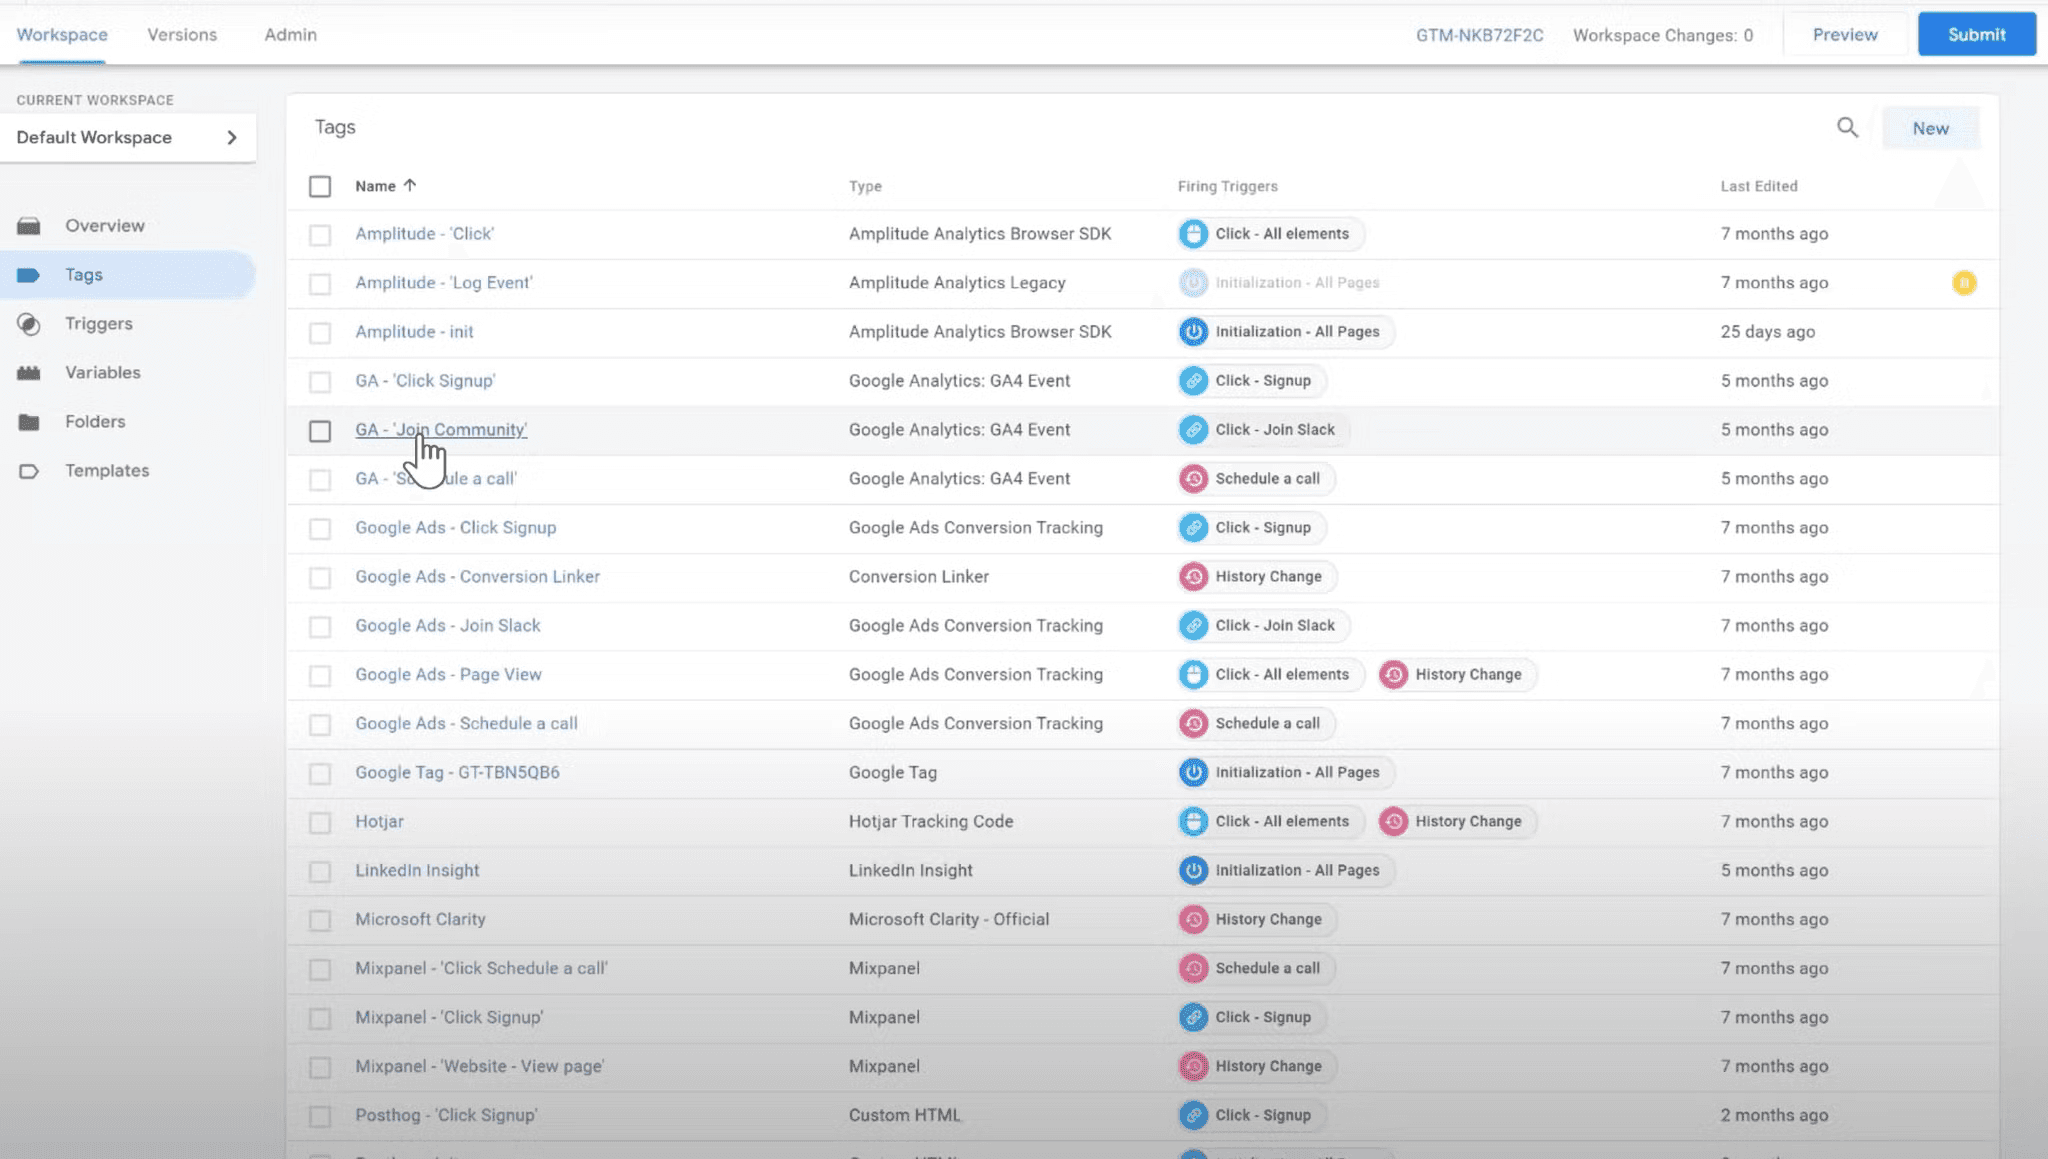
Now, let's create tags that will fire when our trigger is activated:
Create a Google Analytics tag
Create a Google Ads tag
Create a Segment tag (or any other analytics platform you use)
Associate each tag with the trigger you created in Step 5.
Step 7: Testing Your Configuration
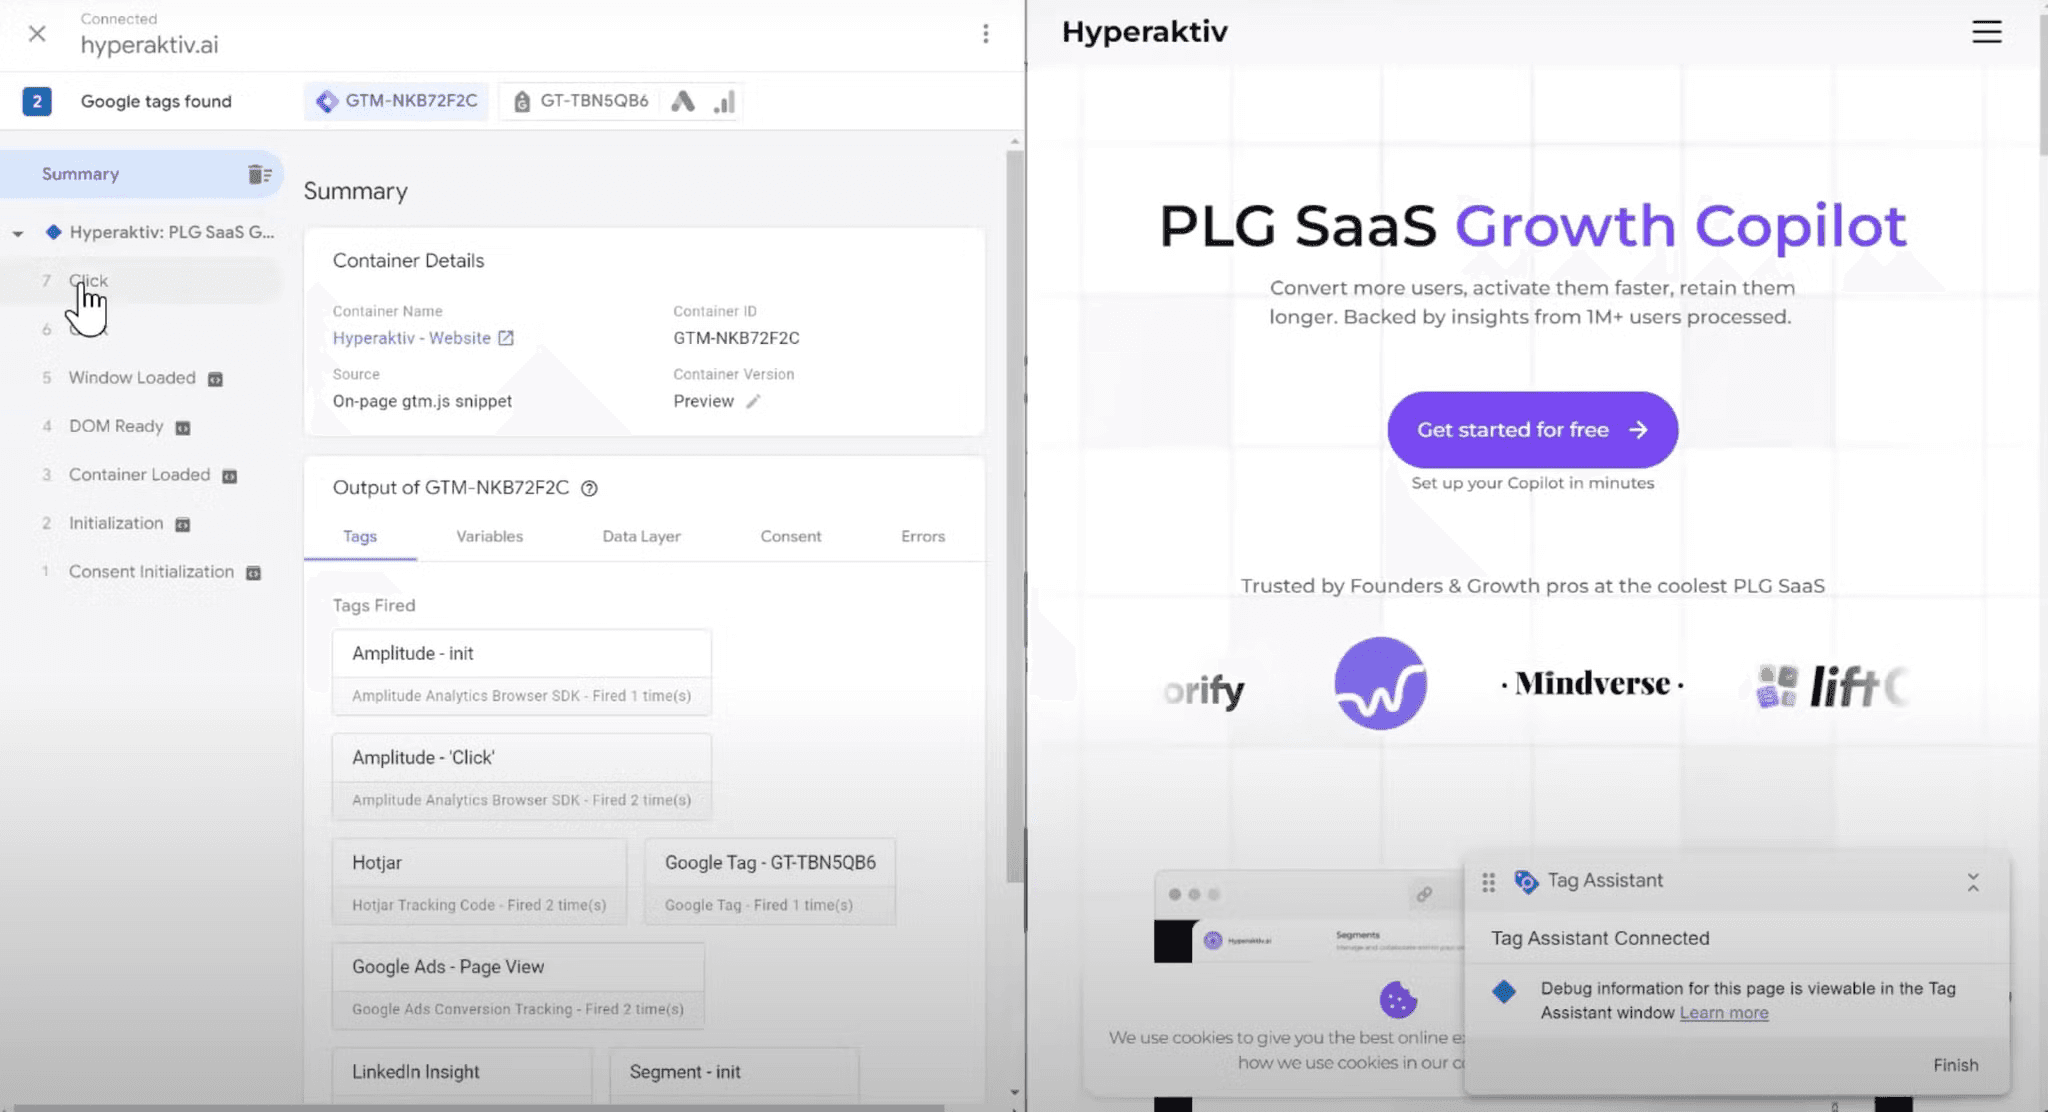
Before publishing your changes:
Click the "Preview" button in GTM
Use the Tag Assistant debugger to verify that your triggers and tags are working correctly
Navigate your website and check if the events are captured as expected
Step 8: Publishing Your Container
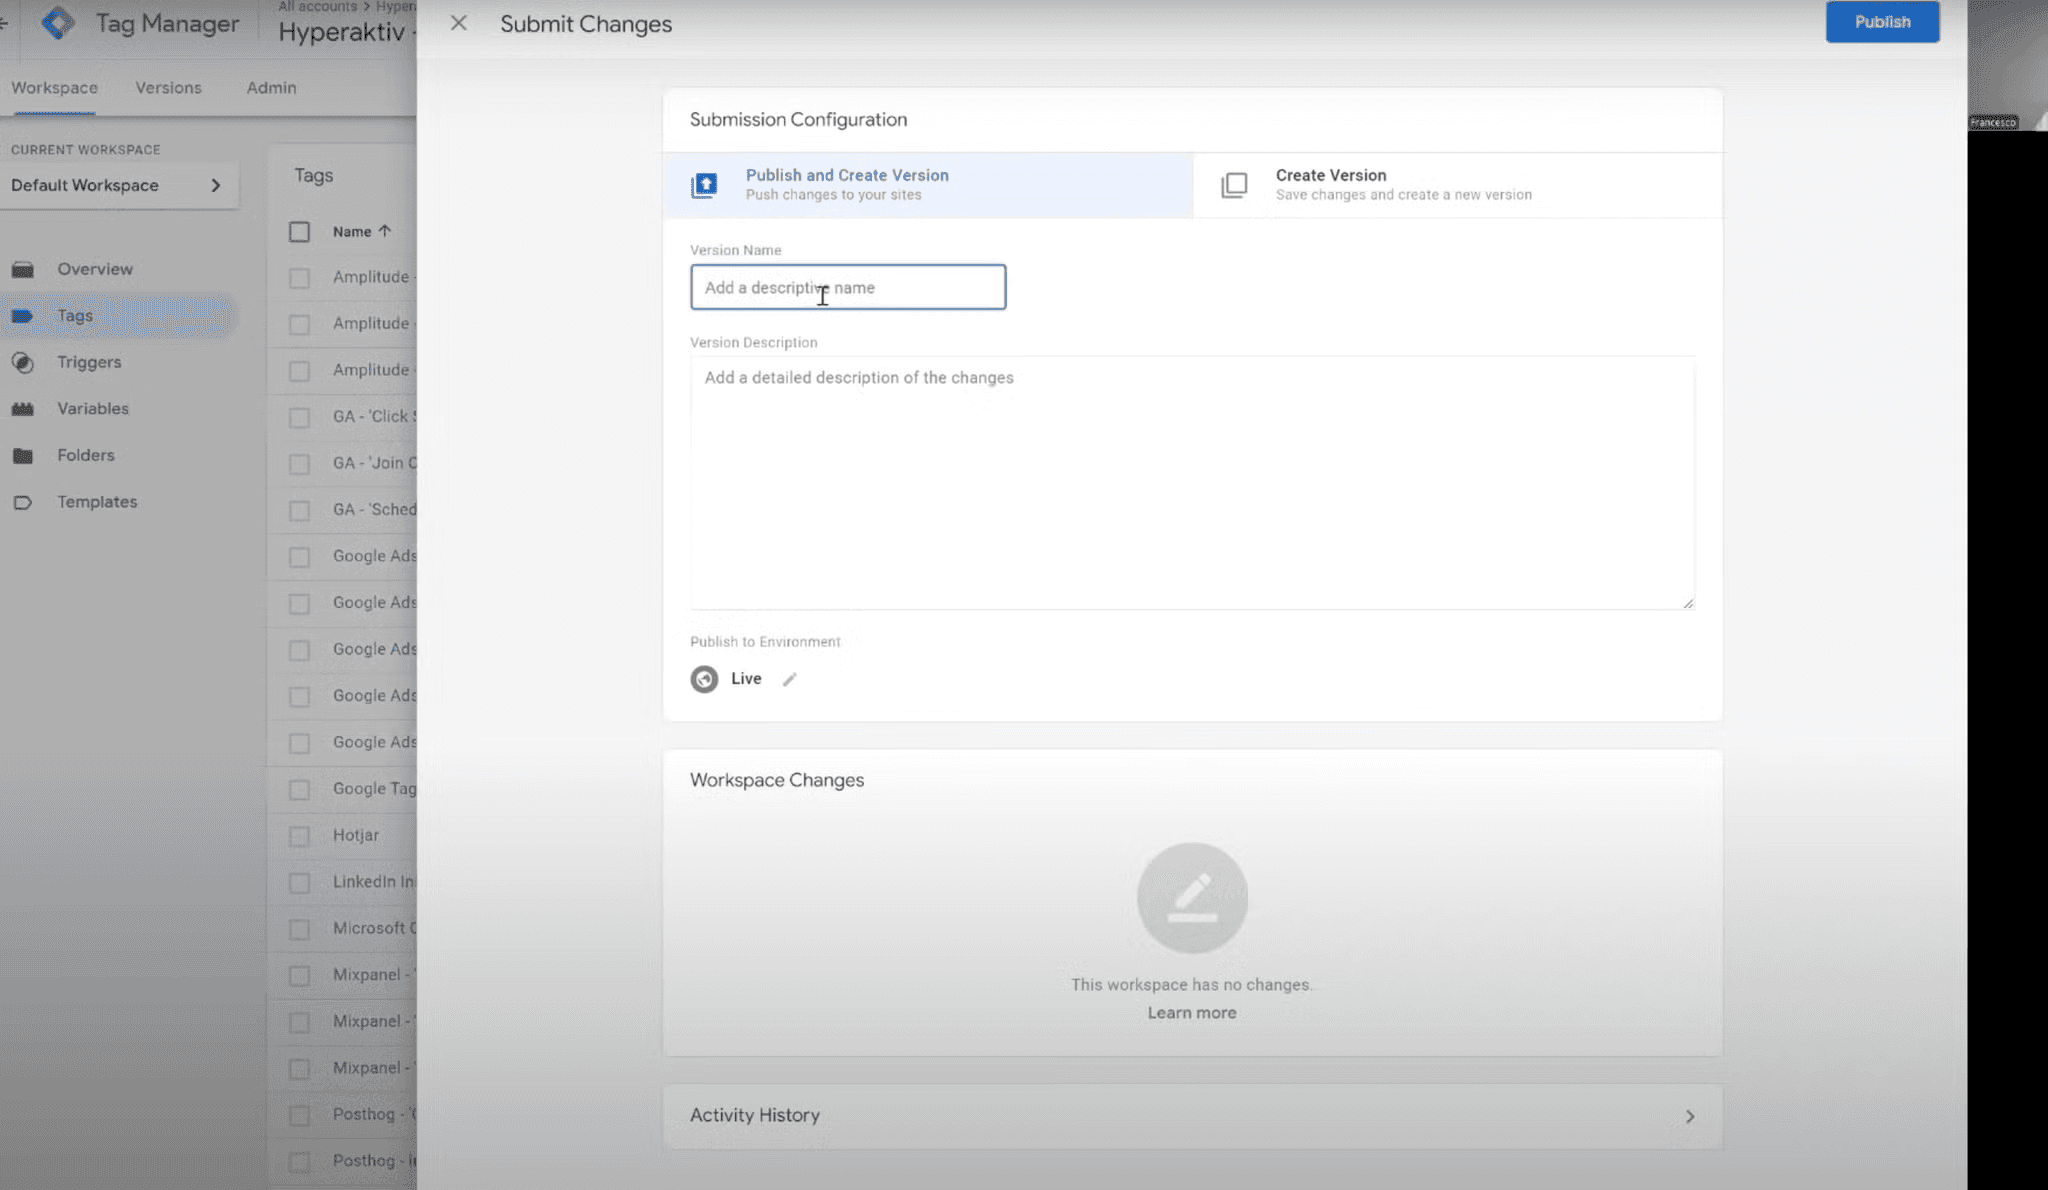
Once you're satisfied with your configuration:
Click the "Submit" button to publish your container
Add a description of your changes for version control purposes
Publish the container to make your changes live
Congratulations! You've successfully installed and configured Google Tag Manager. Remember, you can always make changes through the GTM console without modifying your website code directly.
By following these steps, you'll have a powerful tracking system set up on your website in no time. Happy tracking!
For a more in-depth walkthrough and to see these steps in action, we recommend watching the full video tutorial. The video will provide additional context, tips, and tricks to help you make the most of Google Tag Manager for your website or web application.


